From our archive. Details reflect the date of publication.
As enterprises initiate their journey with Microsoft Copilot, Copilot agents will become essential components of the end user experience. Given their utility and ease of creation, a substantial number of agents will soon be generated. Consequently, users will become overwhelmed, and even confused by the sheer volume and will require an effective method to navigate among them.
Fortunately, you can build a Copilot agent for this purpose: an agent for all other agents…sounds a little bit like 007. 😊
This thesis will guide you in creating an agent (we will call it “007” because it is an agent for all other agents) that provides information about other Copilot agents and assists in selecting the most appropriate one for their specific scenarios. The content will be published as a series of concise LinkedIn articles to ensure ease of consumption.
Below are the sections:
- 007 (Copilot) Agent: An Agent for All Agents (this article):
- Create the 007 agent and wire it with the knowledge base:
- Use Copilot Studio topics to guide users to your agents:
- Publish the agent for end users:
- Final thoughts:
- URL to be defined.
Section 1: Building a knowledge base
Of course, you will need a few Copilot agents before it makes sense to build an agent to manage them all. Refer to section 2 of this series on how to create a Copilot Studio agent or check out this great article for a high-level overview on this link.
For preparing the knowledge for the 007 agent, you will need to get a table like following and save it as a Word or PDF document to a SharePoint site.
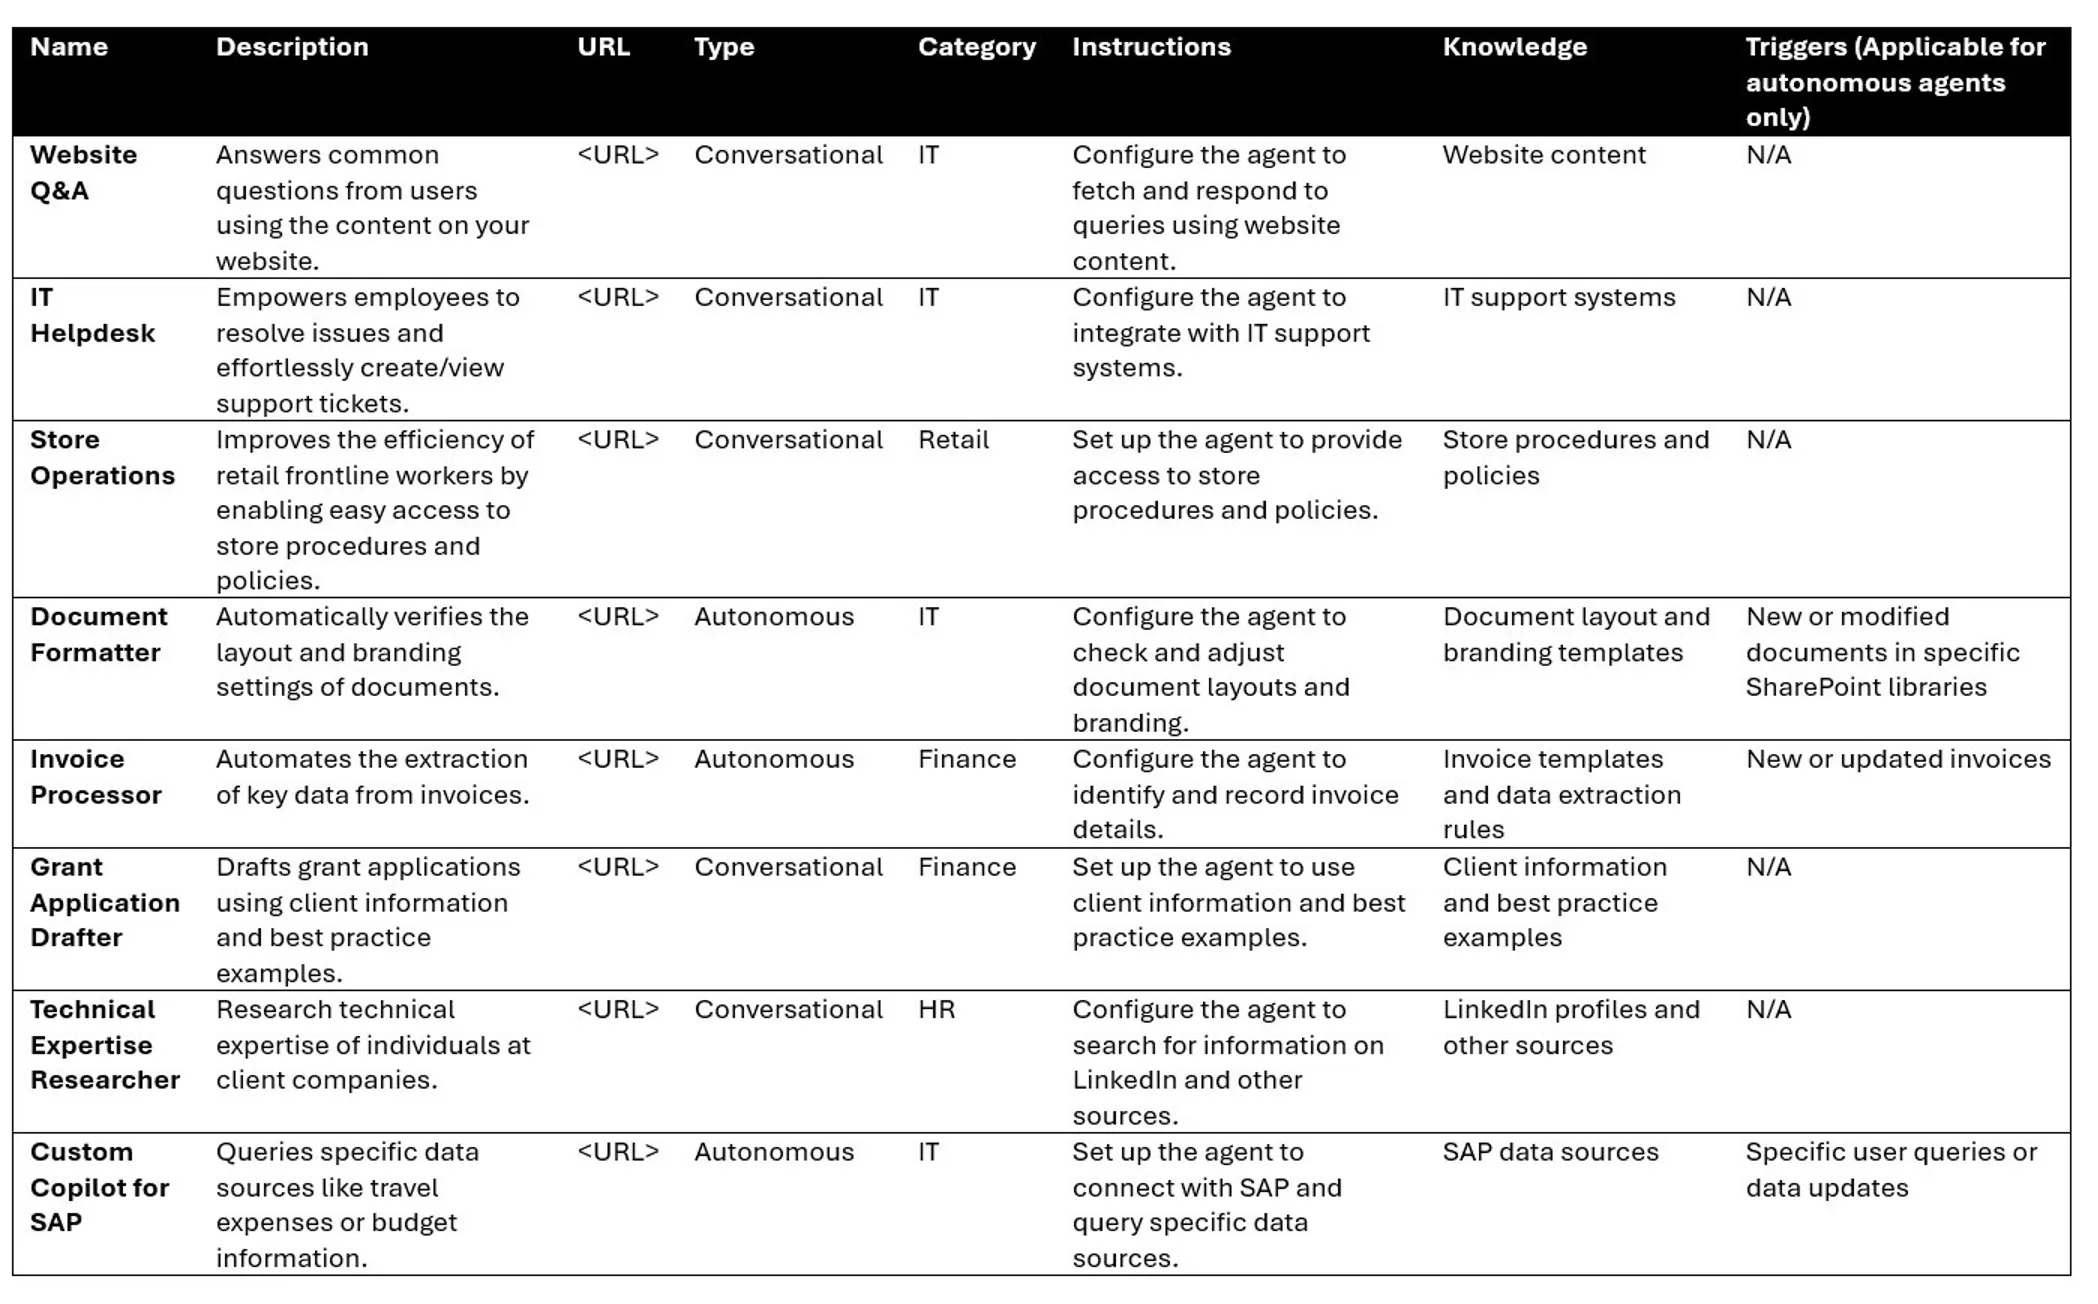
The table should include at least the following columns:
Name:The agent’s name.Description:A detailed description of the agent.Instructions:The instructions for using the agent.URL:A URL to launch the agent.
For the first three columns, the information can be directly copied from the agents’ details page.
The URL column can be a bit tricky; depending on the type of agent, the information may be found in various locations:
- SharePoint agents**:** refer to this link.
- Navigate to the Agent List
Go to the SharePoint site where your agent is located and navigate to the SharePoint site’s
Site contents > Site Assess > Copilot > Approved.

- Get the Link
Locate the agent’s “
.agent” file in the folder and click open the agent file. Grab the URL in agent’s browser window.
Agents published to Teams:
- Publish the Agent Ensure your agent is published at least once. This is necessary before you can share it with others.
- Connect to Teams Open the configuration panel for the Teams + Microsoft365 channel and connect your agent to this channel.
- Find the Link Once connected, you can find the agent’s installation link with other users. This link allows them to install and interact with the agent in Teams.
Copilot Studio agents:
- Open Copilot Studio Navigate to the Copilot Studio within your Microsoft365 environment. This is where you can manage and configure your agents.
- Select Your Agent Find the agent you created. You can do this by browsing through the list of agents or using the search function.
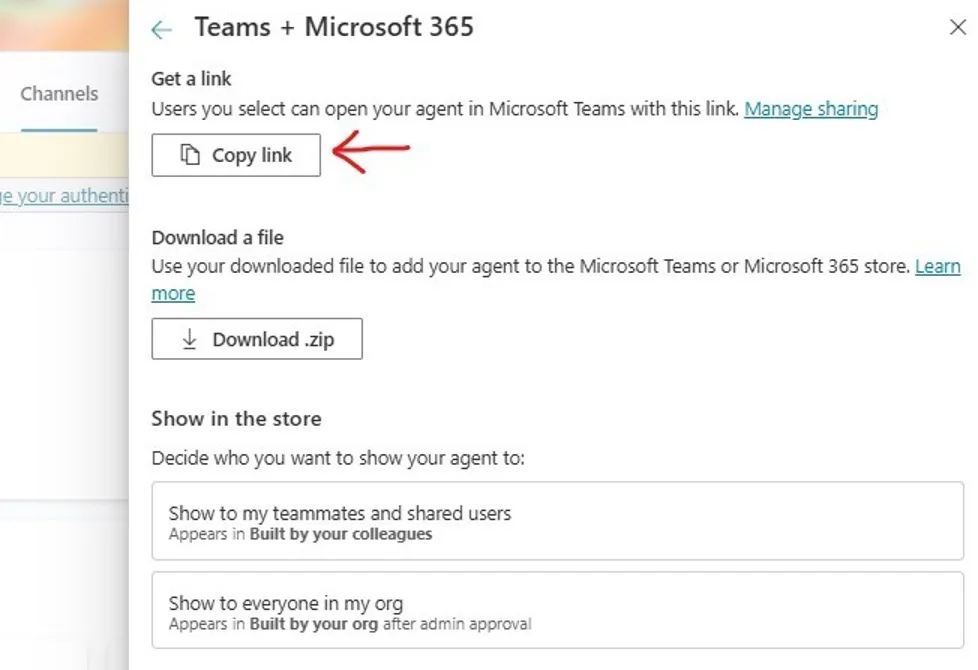
- Copy the URL Once you have selected the agent, go to Channels to share or get the link. Depending on how the agent is published, you can get a direct link to it or a Microsoft Teams link to it.
In my next article I will show you how to build the “007 agent” using Copilot Studio.