From our archive. Details reflect the date of publication.
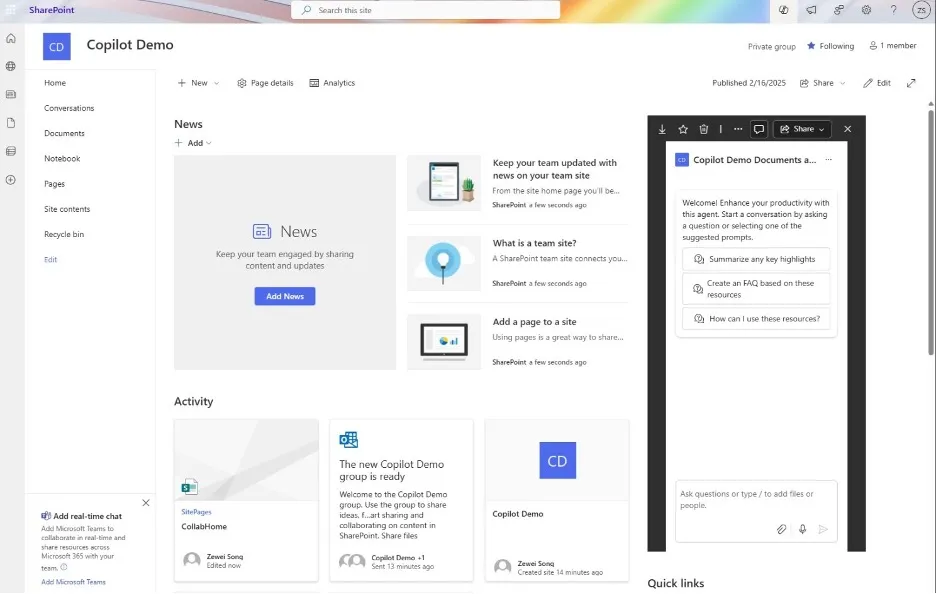
This comprehensive guide provides detailed instructions on how to create a Copilot agent for a SharePoint document library and embed it into a SharePoint page.
By doing so, SharePoint users can conveniently access the Copilot agent, enhancing their experience with Copilot’s semantic search and other AI-enabled capabilities.
It is important to note that end users with premium Copilot licenses (the $30 per month Microsoft 365 Copilot license) can utilize the agent without any additional charges. However, users without this license will be subject to a pay-as-you-go message consumption subscription. For further details, please refer to this article: Manage message capacity - Microsoft Copilot Studio |Microsoft Learn
Create a SharePoint Copilot Agent
- Navigate to the SharePoint library which you would like to create the agent
- Click on the “Create an agent” button on the tool bar
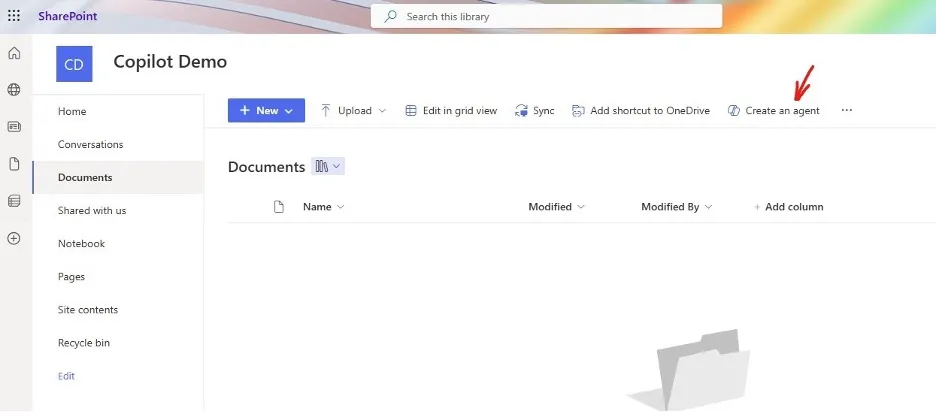
- A Copilot Agent creation dialog will pop up, finish it and create the agent
Approve the agent
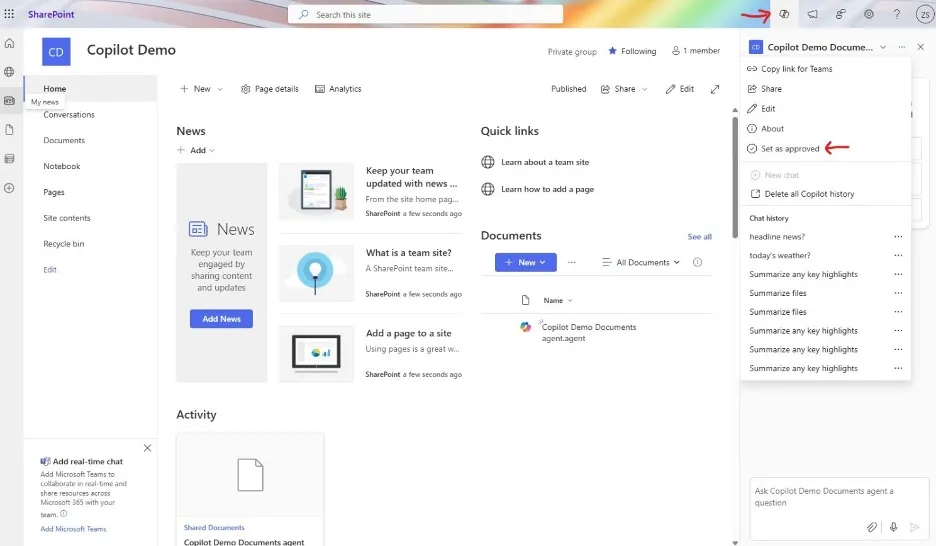
Once the agent is created, you need to approve it to make it official. Follow the steps below:
- Click on the Copilot button on the top navigation bar to open the agents
- Select the agent you just created and click on the “…” button next to its name
- Set it as approved
Get the approved agent’s URL
Now we need to get the agent’s URL so we can embed it to a SharePoint page. To do this, navigate to the SharePoint site’s Site contents -> Site Assess -> Copilot -> Approved.
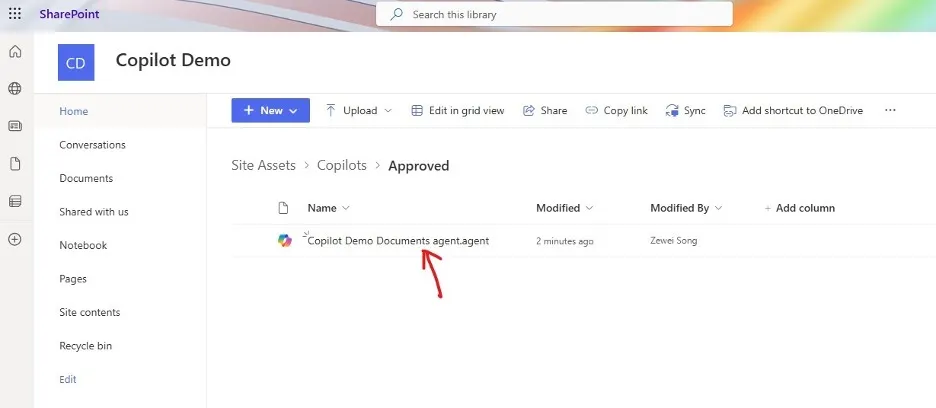
You should see the approved agent’s “.agent” file in that folder. Now click on it to open the agent and grab the full URL on your browser’s URL bar.
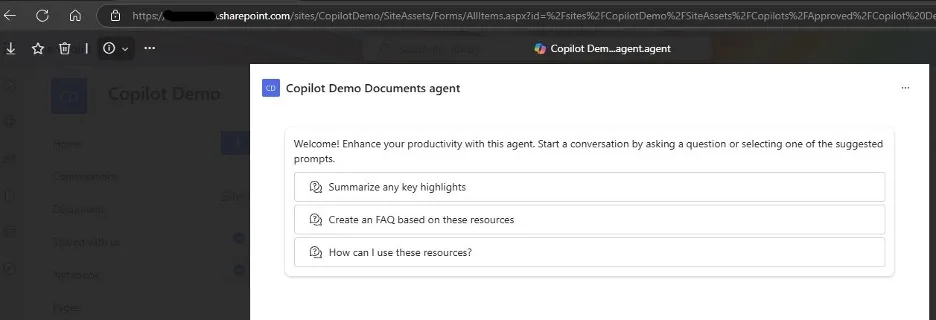
Add the agent to a SharePoint page
The final part of this task: to add the agent to a SharePoint page to achieve better end user experience.
- Find a SharePoint page you can edit. Please note not all SharePoint pages are allowed to be edited, you should see an “
Edit” button on a page’s tool bar (not the top navigation bar!) if you have permissions to modify it. Also please note you can add an agent to a page hosted on a different SharePoint site. - Click the “
Edit” button and now you are in its edit view. Choose a place on the page you would like to add the agent to. In this case, let’s add it to the space above “Quick links” section.
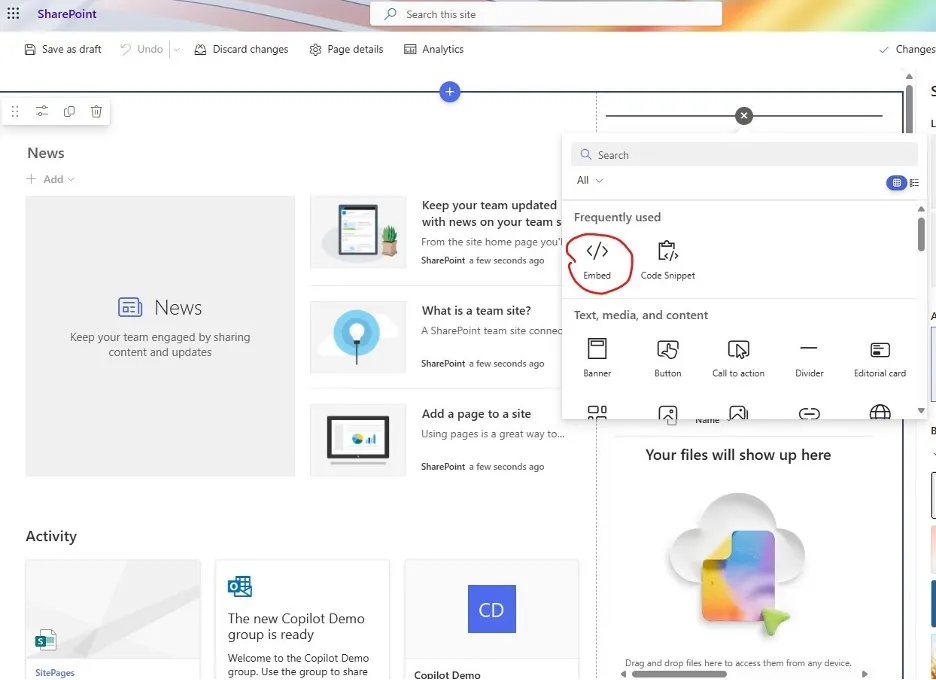
- After clicking on the “
+” sign on the page’s edit view, choose the Embed webpart.
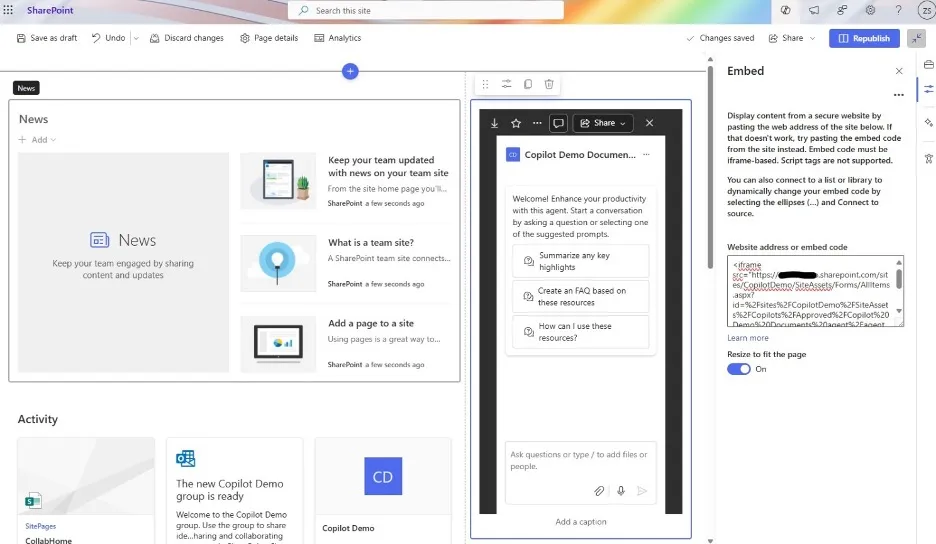
- You now need to add an iFrame tag to the Embed webpart’s code section. The HTML code should look like below:
1<iframe src="--the full URL to you agent--" width="360" height="720"></iframe>
In my case the iFrame code is something like:
1<iframe
2src="https://******.sharepoint.com/sites/CopilotDemo/SiteAssets/Forms/AllItems.aspx? id=%2Fsites%2FCopilotDemo%2FSiteAssets%2FCopilots%2FApproved%2FCopilot%20Demo%20Documents%20agent%2Eagent&viewid=708ee07e%2D3e99%2D4da2%2D942f%2D9506762c8e32&parent=%2Fsites%2FCopilotDemo%2FSiteAssets%2FCopilots%2FApproved" width="360" height="720"></iframe>
- Feel free to change the width and height value to fit your page’s layout
- Save and republish the page, now you have an embedded Copilot agent!